How’s It Growing?

Now that my Dad’s garden has been in the ground for 10 months, it’s time to take a look at how things are growing. 

We installed the plants in late August last year.  I would have preferred to wait another month or two, but, well, the temptation to make use of my burly brother for digging while he was visiting was just too great.  Most of the plants survived the end of summer heat waves and then spent the fall and winter establishing themselves.  Our long, wet spring delayed the burst of growth a bit, but when it hit, it was exciting. 

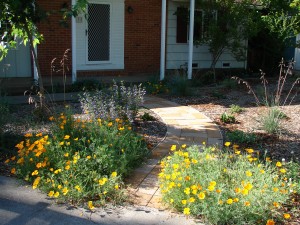
Colorful native perennials and annuals line the front walk

By early May, the grasses and perennials were growing with gusto and radiant with color.  We enjoyed watching native bees, butterflies, and honey bees buzz the poppies, penstemon, and mint bush.

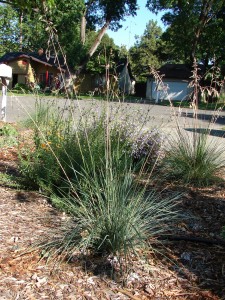
The native bunch grass, California Fescue, being a cool season grass, began filling in when the rains started last fall.  In April, it lent the garden nice movement when it sent up its 4′ tall flower spikes. 

California Fescue, a native bunch grass, adds movement to the garden with it's 4' tall flower stalks.

The deer grass, a warm season grass, waited until late spring to start growing.  When it’s full sized, it will anchor the front of the garden which right now looks kind of sparse.

The shrubs will fill in over the next couple of years.  They are planted to create a dense backdrop behind the perennials and grasses and provide from the neighbor’s garage.  Coffeeberry, currants, dwarf manzanita, and mock orange are all sending out lots of new grow. 

Just starting or getting ready to bloom now, in July, are two species of buckwheat and some narrow-leafed milkweed.  With the ample moisture this spring, the buckwheats exceeded my expectations for height.  In fact, the Naked Buckwheat’s flower stalks grew so tall and succulent that they flopped over in a wind storm and then continued growing up from the ground like cobra heads.  Weird.  I trimmed them back and the new stalks are straighter, sturdier and just about ready to flower at a more typical 2-3′ height.

Sequencing Garden Construction to Avoid Conflict

What to do with all that creative garden energy while you wait for fall to plant?  Get the rest of the landscape ready!  Plants should be the finishing touch on a garden to protect them from damage during other gardening projects.

Once you’ve completed your garden master plan, decide whether you want to tackle the whole garden or divide it into smaller projects to be completed individually.  Which ever approach you take, there may still be infrastructure projects that should be done first to avoid conflict later on.  The key concept:  Don’t paint yourself into a corner!

At the top of the list is grading your site to ensure drainage away from your house and other structures.  Water is the enemy of buildings.  Take the time now to evaluate and correct any problems you have with drainage.  At the least, make sure that all earth and paving slopes away from your house for a minimum of 5′.  If you have dampness or puddling near or under your house or smell mold or mildew during wet seasons, you may need to install drainage structures such as drain inlets/piping or french drains to carry water away from your house.

Consider where you may need to use heavy equipment and make sure that your current phase of construction doesn’t block access routes.

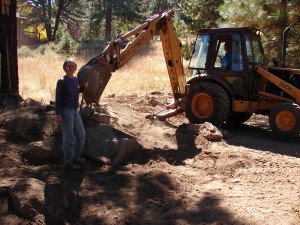
Placing Boulders with a Loader

If you are adding an automatic irrigation system, electric lighting, or gas for a barbecue, consider the needs of the entire garden and where your piping or wiring will need to go. Trench and install piping or sleeves (larger diameter piping through which the actual  pipes can be run) in areas that will be constructed during your current phase to service future phases.  If  piping or sleeves must run through paved areas, make sure it is installed well below grade to allow for excavations for base rock, sand, and paving materials.

Do you want to replace your lawn with drought tolerant native plants?  Summer is the time to let the sun do the work of killing your lawn using a technique researched by UC Davis called Solarizing.

Once your infrastructure projects are finished, you can start adding the fun stuff.  Construct your hardscapes such as paving, decks, walls, shade structures, boulders, etc., now.  Keep referring to your master plan; sequence construction to avoid future conflicts.  For example, if you want a pergola over your stone patio, get footings and post bases in before you pave.

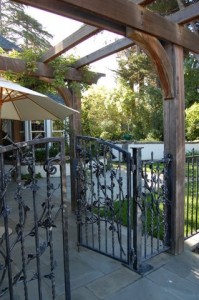
Install Pergola and Fencing Footings Before Paving

After construction is complete, prepare your soil for planting.  Loosen compaction caused by construction.  If you are planting edibles or ‘traditional’ landscape plants (i.e., not natives), amend the soil as necessary.

And, finally, when fall arrives, you are ready to install your plants.  They’ll put their energy into root development and reward you with vigorous growth and vitality next spring.

Urging Restraint

Winter is finally releasing its strangle-hold on the landscape, buds are bursting, the hillsides are glowing chartreuse, and I really feel like digging holes in my garden.  Which is fine, if I want to plant things that like to be watered.  Fruits, veggies, ‘normal’ landscape plants, stream-bank

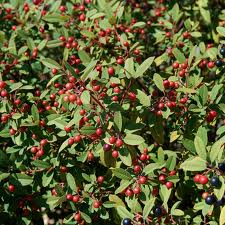
Coffee berry is a Butte County native that can tolerate some summer water

plants, shade lovers . . . these guys all enjoy being released from the confines of their containers into real dirt when spring is springing.  I’ll water them during planting and keep doing so as they need it through spring, summer, and fall until the rains begin.


But . . . and I hate to say this because I don’t want to convey anything but complete enthusiasm for native gardening . . .  I’m trying not to plant super drought tolerant California native plants now. Excellent dryland plants such as Ceanothus, White Manzanita, Foothill Penstemon, and Canyon Live Oak deserve to be in the garden, but will reward you with their best vitality if you wait until fall to plant them.

Here’s why.  The natives that grow on hot, dry sites have evolved to thrive in our summers without supplemental water.  To do this, they require well developed root systems.  Their root systems do not like to be watered in the summers; the most drought tolerant species are actually prone to dying if they receive summer water.  So, the best way to ensure their health is to water them well at planting and then leave them alone.  No water, no fertilizer.

If I try to plant super drought tolerant natives now, with summer just around the corner, chances are much lower that they will be able to grow enough roots to allow them to survive unwatered until the rains come.  If I just can’t help myself and irrigate them, they might survive.

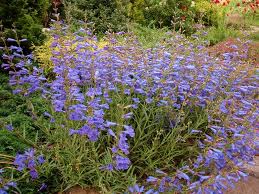
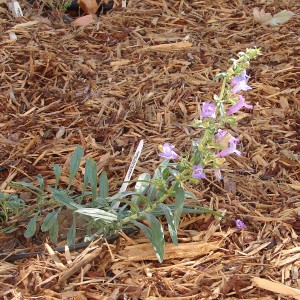
Foothill penstemon will do best without summer water

Or,  the combination of water and warm soil may cause them to develop  fungal root disease.


I’d prefer to wait until fall to plant these beauties.  If I get them in the ground in October or November, before the rains start in earnest, they will have all winter and spring to grow those essential roots.  By next summer, they’ll be ready for drought.  If it’s a dry spring, I’ll water them before the weather starts heating up to help them establish  and ‘charge’ the soil.  But, once it gets hot, I’ll turn the water off .  And the success rate will be much higher than it would have been if I’d given in to the temptation to plant right now, in this beautiful spring weather.  The beauty and satisfaction of using the most appropriate plants for our environment is worth waiting for the right planting time.

Plants should be the last thing to go into a landscape, whether they are our wonderful drought tolerant natives or not.  Next post, I’ll share ideas on sequencing the installation of a new landscape.


The Beauty of a Master Plan

A page of planning is worth a book of re-doing.  Or something like that.  A garden is a long term investment that takes years to realize it’s potential.  Taking the time to create a master plan before planting the first tree will save time, labor, and money and result in a more cohesive, beautiful, functional, and easily maintained garden.  A master plan does not lock you into a rigid design but rather helps keep the big picture clear.

A master plan can be as simple a diagram, drawn to scale, that shows the location, size, and relationship between the various elements that you want in your garden.  Kind of like the floor plan for a home design.  It may indicate the overall concept of the garden and indicate material selections such as stone, fencing, and plant types to create the desired look.

To create a master plan, first consider how the space will be used.  Who and how many will use it on a regular basis?  For special events?  What will they be doing?  When?  What are the most pleasant parts of the existing garden?  The least?  This information will help you understand the types of amenities that may be useful, how big different areas should be, and whether protection from the elements may be needed.  ‘Hardscape’ elements like decks, patios, pools, shade structures are the bones of the plan.  All other elements attach and relate to them, and embellish them.  They cost more effort and money to install so it’s critical to make sure they are built to meet long term needs.

Once you understand how the garden is to be used, think about how you would like it to look and feel.  Beauty is a judgment call and a garden is very personal.   Take photos of garden elements that you like and peruse garden books and magazines to help clarify your tastes.

And then, there is reality.  What is your budget?  Who will be doing the construction?  What is the time line for construction?  Who will be doing the maintenance and how much time do they want to spent doing it?  Nuts and bolts questions like these will help you select appropriate materials and amenities.

With this thought process and information, you are ready to start drawing up a master plan that will guide you from start to completion of your personal garden.  Have fun!

Incredible Edibles

When designing with edible plants, my goal is to create a beautiful garden that doesn’t look like a ‘vegetable patch.’  I use edible plants in the same ways that I use ‘regular’ garden plants.  By incorporating a mix of edible trees, shrubs, and groundcovers I can create a sequence of spaces and frame hardscape areas like patios, pavilions, decks, meditation nooks.

I rely on deciduous and evergreen perennial edibles that live for years or decades.  Many deciduous fruit and nut trees thrive in the North Valley.  They can provide the shade, screening, blossoms, and fall colors of typical deciduous landscape trees such as magnolias with the added bonus of fresh fruit.   Evergreen trees such as citrus and olives provide year-round green, fragrant blossoms, and, of course, fruit.

Edible perennials, including persimmon, daylilies, herbs, roses, and strawberries, enhance this courtyard

Edibles that serve as shrubs include evergreen types such as bamboo (roots are edible), tall rosemaries, and dwarf citrus and deciduous types such as blueberries, rhubarb, and roses (the petals

make a lovely addition to salads!).  I use shrubs to define spaces within a garden, provide screening, and as a backdrop for art.

Herbs like creeping rosemaries, thyme, oregano, and chamomile and perennials such as daylilies and strawberries can be used as groundcovers in place of standard plants like ivy or junipers to soften the edges of walkways, spill over walls, help suppress weeds, cool ground temperatures, and prevent erosion.

By using perennial plants in the place of traditional landscape plants, I can create a garden that looks good all year and functions on many levels with places to relax, play, and entertain.  It can even include a vegetable patch!  But it won’t remind you of a farm.

Part of the fun is being able to graze on your home grown delicacies as you wander through your personal Eden.

The Difference Between Native Grasses and the Brown Stuff

When  I’m raving about the beauty of native landscapes, I’m not talking about the vast expanses of  brown grass that dominate our hills and valleys.   Nope.   That weedy stuff is NOT native.  Its a mix of exotic invasive plants, mostly annual grasses with some notable perennials mixed in.  The Spanish missionaries brought the first invaders over and the assault has continued since.   We’re left with a such a pervasively different look that many people think that our ‘Golden State’ nickname refers to the brown.

What used to be there?   Tall perennial bunch grasses that stayed green all summer interspersed with smaller flowering plants that combined to make a spring display so spectacular, John Muir stopped dead in his tracks when he first saw it.   Many of our spring flowers still bloom, but the grasses are mostly gone from the wild.  Fortunately, there are nurseries that offer many of the native grasses from seed or in containers so that we can enjoy them in our gardens.  Floral Native Nursery in Chico is an excellent source.

What do the native grasses offer in the garden?  They retain a soft green blush through the summer, thrive on minimal care,  and support beneficial wildlife.  Their upright habits give them a structural quality that plays well with more amorphously shaped plants and ground covers.

Deer Grass (Muhlenbergia rigens). Courtesy Gerhard Bock.

One beauty, Deer grass (Muhlenbergia rigens) naturally occurs in oak savannas and near seeps throughout much of Butte County.  It forms a 2-3′ tall by 4-5′ wide clump of softly arching grass blades with 4-5′ tall flower spikes (inflorescence) in the summer and fall.  Looks great when back lit by afternoon sun.  Deer Grass is easy to grow in full sun to part shade.  If you treat it right – plant it in the fall, little to no summer water, no fertilizer, don’t mess with it much – it will live for a decade or two.


So, How Much Did It Cost?

With Eve’s Garden Design, one of my goal’s is to bring beautiful, sustainable gardens to regular people.   A garden really can be installed by hand without calling in the big machines; it can be maintained by people without a degree in horticulture, and it can require minimal care so that it is a joy, not a burden to its humans.  And, a garden can be affordable.

My dad’s garden is a bit of a demonstration garden.   I used ‘best practices’ in constructing it to minimize future maintenance requirements and so that I would be able to tell people how much it costs to do it right.  We kept every receipt for the materials used.

This garden cost less than $1,000 for all materials. By next summer, it will be beautifully filled in.

The total cost?  $943, including sales tax.

That includes plastic sheeting for solarizing, parts to convert his spray irrigation system to drip, landscape fabric (weed barrier), plants (and I did over-plant in my enthusiasm for creating a lush looking demo garden), mulch, and sand for under the pavers (the pavers were free, salvaged from the demolition of another project).  It doesn’t include hiring laborers because we did all the work ourselves.  That’s my 78 year old dad (two prosthetic knees), my very strong brother for one day, and me.  It took approximately 40 people hours to install everything, working at a reasonable, not frenetic, pace.

And, there are many ways to cut the cost far below what we paid for my dad’s garden.  A sustainable garden is an investment in your future and in the future of your neighborhood and your planet.  It will enrich your life and doesn’t have to hurt your bank account.

Simple Changes

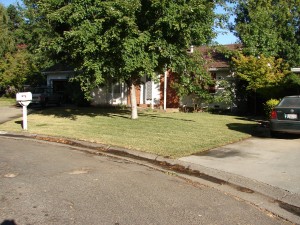
When I analyze gardens that are about to be remodeled, I’m looking for ways to make them better fit my client’s needs.  In the case of my Dad’s front yard, he was tired of all the lawn upkeep.  Other than that, he was happy with what he had.  It was a simple layout with an existing walkway that connected the front porch to the driveway, two existing maple trees, and lawn. 

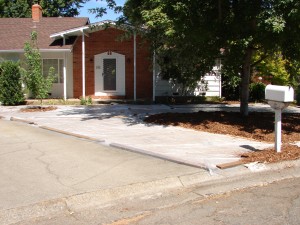
One of my jobs, as a designer, is to suggest possibilities that my client’s may not have considered.  For this garden, I noticed that the existing walkway didn’t really take people where they wanted to go.  It forced users to make a hard right immediately after stepping off the porch and deposited them right next to the garage door.  Adding a path that traveled straight out from the porch before curving toward the driveway would offer a sensible, gentler route. 

A New Path

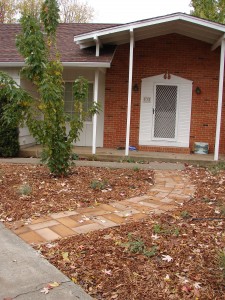
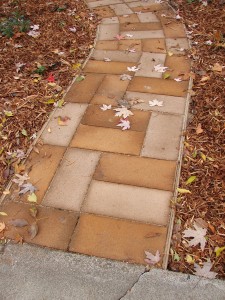
We recycled some used 8″ x 16″ concrete bricks that I had leftover from demolition of another project to make the new walk.  I’m a huge fan of repurposing landscape materials to save costs and resources and look for creative ways to use what is already on hand.  In this case, coloring the bricks and using an alternating pattern when laying out the path created a fresh look that compliments the home and garden. 

 To enliven the gray bricks, I stained some of them with Scofield Chemstain. Chemstain reacts with the concrete silicates to create mottled, permanent color.  I used Pale Terracotta color to give them a rich rusty brown color that looks good with the bricks on the front of the house. 

The path layout is simple; it aligns with the front door and sweeps toward the driveway.  We left the original path in place so people can get straight to the garage but find ourselves most often using the new path to leave the house. 

Brick Color and Pattern

An Artsy Touch

Once all the plants were in, the garden still needed something.  First thought: a grouping of native lichen-covered boulders.  Second thought:  how the heck would my 78-year-old Dad and I pull off a boulder placing project (I am quite the pencil-neck).   Then: DOH!  How about some art?  I’ve been telling people I’m an artist; here was a chance to make good on that claim.

What the garden needed was something vertical and fairly big to add visual weight and to provide a link between the large existing maple tree and the low growing grasses and perennials that we just planted.  A sculpture, weather proof, subtle to respect my Dad’s complete lack of ostentation.  And something that would be specific to this particular garden.

A Sculpture to Reflect My Father's Personality

To generate ideas, I spent a bit of time brainstorming and writing with my left (non-dominant) hand.  In her inspiring book, Visioning, Lucia Capacchione discusses how this technique can greatly improve access your right brain and subconscious.   I’ve been using it for several years for everything from garden design to portrait paintings and am always amazed at the unexpectedly creative results.

For this project, I wanted to develop a concept that would reflect my father’s love of sailboarding.  Yes, my Dad – who hosts two prosthetic knees – is a big-time windsurfer.  My right brain took the idea of a sail-inspired wire sculpture and ran with it.

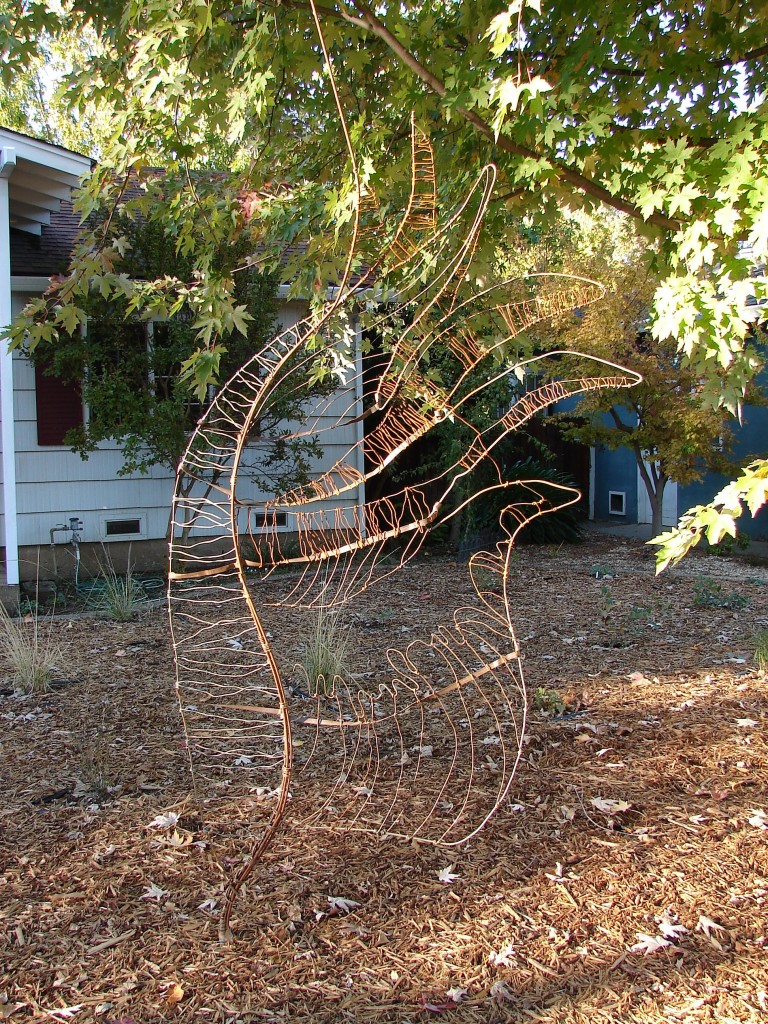
Sail On, a wire sculpture reflecting my father's passion for windsurfing and aviation

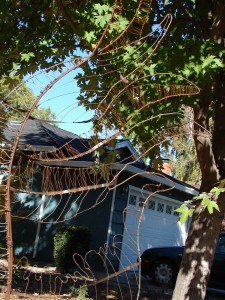
The final sculpture has the basic form of a sail, sort of, with a mast and metal strips that suggests the ribs of the sail.  My right brain thought I should play with the shape to suggest a wing with ‘feathers’ of bent wire to reflect my Dad’s career as a pilot as well as to refer to a seafaring bird, the Royal Tern, that visits my dad’s favorite windsurfing mecca, Bonnaire.  And, add abstracted wave patterns to reinforce the windsurf element.  The whole thing is made out of twisted metal, much of it salvaged, with no welds. The wire and rebar had to be thin enough for me to hand bend so the piece has a very light, open appearance that, with its gentle rust color, does not overpower the garden in spite of its 7′ height.

Next Up: Irrigation

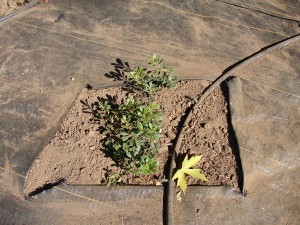
Drip emitters for this plant are punched directly into the 3/4" main tubing

Once the plants were in the ground, we still had some work to do.  My goal is to provide a lush garden that requires very little maintenance.  And, with as many plants as we added, that means adding automatic irrigation and mulch.

My Dad already had three spray irrigation zones in the front yard that he had used to water his former lawn.  We kept one spray zone to water some of the existing plants that we left in place.  The other zones we converted into two drip irrigation zones, one for the shade tolerant plants that went in the shadow of an existing maple tree and one for the sun-loving super drought tolerant plants.

The in-line emitter method with 1/4" tubing with 1/2 gph emitters every 6".

We ran 3/4″ Hardy Blue line piping in a closed loop from each valve then added drip emitters at each plant.  We used two different methods to put the emitters at each plant. Method A:  Punch the 1 gallon per hour (GPH) drip emitter directly into the 1/2″ drip main tubing.  We did this wherever the main was located right up next to a plant.  Method B:  Where plants were located away from the main tubing, we ran 1/4″ spaghetti tubing from the main to the plant, then connected 2′ of  in-line emitter tubing that has 1/2 gph emitters at 6″ o.c. spacing  (4 emitters per plant).  The loose end of the tube gets a ‘goof plug.’  Both methods work well; you can pick either one or combine them in a single zone.

Once all of the plants had irrigation to them, we tested the system to make sure everything actually worked as planned.  It did!  A 4″ layer of mulch over the landscape fabric and irrigation tubing finished up the job.

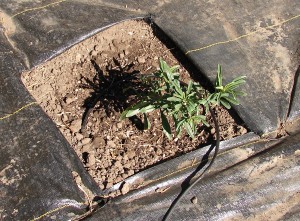
We ran both of the drip zones for a half hour that day.  Then, we ran both zones every three to four days for the next couple of weeks.  Because we did a major no-no, planting in the summer, we had to watch the plants closely and add more water than we would have if we’d have planted a month or two later.

When temperatures shot up to the high nineties and then topped 100 for a couple of days, some of the new plants were stressed.  I pruned back those that looked crispy and they are all now showing healthy new growth.  These guys are tough.

Now, a month after planting, we are

Foothill Penstemon two weeks after planting, in full bloom and growing.

running the shade zone every 4 to 5 days and the sun zone once a week, both for 1/2 hour.  Total water usage for the two zones is less than 100 gallons per week.  Compare that to the 625 gallons per week that my Dad had to put on the former lawn.  And, next summer, when the plants are fully established with nice big root systems, we’ll be watering the sun zone only once or twice a month and the shade zones about once a week.  Amazing!

The Front Yard Evolution Begins

A Resource Devouring Lawn

My mission to convert lawns in Chico into native and edible gardens began with a death.  My kind and gentle father agreed to let me murder his front lawn.  This wasn’t a limping, half-dead lawn, either.  He’d been carefully mowing, fertilizing, and watering it into a state of lush greeness for the past nine years.  In fact, that was the only time he ever spent in his front yard.  And, being the supportive guy that he is, he not only approved of the proposed killing but acted as my accomplice.
Solarizing with Clear Plastic

We started Solarizing in late July.  Solarizing is a simple, non-toxic method for killing lawns that UC Davis has researched extensively, ceamador.ucdavis.edu/files/942.pdf.  We thoroughly soaked his lawn with water (I mean, really soaked it, for hours) then rolled 4 mil clear plastic to completely cover it.  We used 1×4 boards and stones that my Dad already had to securely fasten the plastic.  Total time: less than 2 hours.

Six weeks later, we removed the plastic.  Ta da!  Nothing but dead lawn except for a couple of small spots in the shadow of the large maple that grows in the center of the lawn.  I used a hoe to peel these out, roots and all.  We left the remains of the former lawn where they lay so they can compost into humus.

We were ready to start Phase 2: planting.

Here’s a step by step description of our Solarizing process.
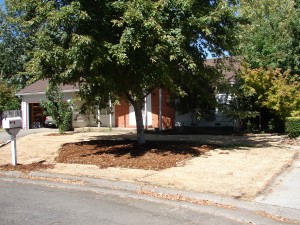
The Lawn is Dead

Materials:

1. Widest clear plastic sheeting you can find – least 10′ wide, clear plastic. Wider is better although more cumbersome to use. You can use one to four mil thickness plastic for solarizing. We used 4 mil thickness because we were concerned that wind might tear a thinner plastic.  However, thinner plastic does allow more heat to get to the soil.  Painting stores and hardware stores carry all types. It’s sold in rolls.

2. Fastening materials: Clear plastic packing tape (the strong, wide kind) to hold the plastic sheets together at the seams.

3. Fist sized stones or narrow boards to weigh the plastic down to prevent billowing.

4. Marking spray paint. This is the kind that sprays upside-down.

5. Utility knife to cut the plastic.

6. Two people (three is even better) on ‘plastic day’

Process:

Solarizing is a non-toxic method to kills lawns and annual weeds.  It works best in full sun.  Use solarizing to kill fescue, rye, and bluegrass lawns.  It is less successful for Bermuda grass.

Day One: Preparing your lawn

1. ‘Scalp’ your lawn with mower set at lowest setting.

2. Mark the location of your irrigation heads with the spray paint. Spray the grass around the head, not the head. If your irrigation heads are hard to find, turn them on briefly so you can spot them.

3. Using a trenching machine, cultivator, or a shovel, dig a trench 4″ deep by about a foot wide around the perimeter of the area to be solarized. Bevel the inside edge of the trench so that there is not an abrupt ‘drop’ into the trench.  Pile the dirt along the trench outside of the area that will be solarized. Watch out for your irrigation heads!

4. Water your lawn very thoroughly. This may take a whole day or more if you don’t have automatic sprinklers; you need to soak it deeply with about 12″ depth of water. Put several cans on your lawn to keep track of how much water you are putting down.

Day Two: Plastic Day

5. Put plastic down: Starting at one of the outside edges, roll plastic out one row at a time. Use dirt stockpiled from your trench to anchor the outside edge of plastic. At seams, overlap by 6-12″ and use a several inch long piece of tape every few feet to fasten the top layer to the bottom layer.   To prevent billowing in wind, place boards or stones on the plastic.   Success depends on a snug fit and tight seal!

6. Wait 4-6 weeks. It will take longer if the weather is not consistently hot (above 80 degrees) during the day or if there is shade cast onto the area.

7. Remove plastic. Dump trench soil onto the interior of the dead lawn so that you retain your trench. The trench will help prevent mulch (added later, after solarizing is complete and plants are in) from spilling from your planting beds. If any patches of lawn show signs of life, use a hoe to peel back and remove the sod.  As for the dead lawn; just leave it in place.  Eventually it will compost.


Welcome to My Garden

Although Eve’s Garden Design is a new venture for me, it’s been a nearly 20-year journey getting here.  Over the years, I’ve designed a lot of interesting places, from intimate gardens to parks, streetscapes, and plazas.  Each project has helped define my sense of  purpose as a landscape architect and has honed my design sensibilities.  And now, I find myself knowing precisly what I want to be doing.  I want to work with people who are ready to move from the usual toward the unexpected, who want their outdoor spaces to reflect their ecological ideals and their personalities, and who want to surround themselves with artistic, sustainable, life-giving beauty.  The crazy economy is already giving us a nudge (a shove?) in a less-consumptive direction.  I’m going to run with that.