Tag Archives: Solarizing

Replace Your Lawn with CA Natives

Looking for a way to reduce your water consumption?  A garden of native plants offers color, texture, pollinator and bird habitat, seasonal interest, and the single biggest opportunity for water savings for most homeowners.

No argument: lawns make an unbeatable playing surface.  But many lawns, especially front yard lawns, are rarely tread upon.  Too often, they are grown by default for their reliable greenery.  But that greenery comes at a high cost.  Landscape irrigation accounts for 75% of residential water use in Butte County.  Replacing lawn with drought tolerant native plants can cut landscape water use by over 80%, resulting in potential savings of around 750 gallons per week during the peak of summer for every 1000 square feet.

A Native Rich Garden Save A lot of Water

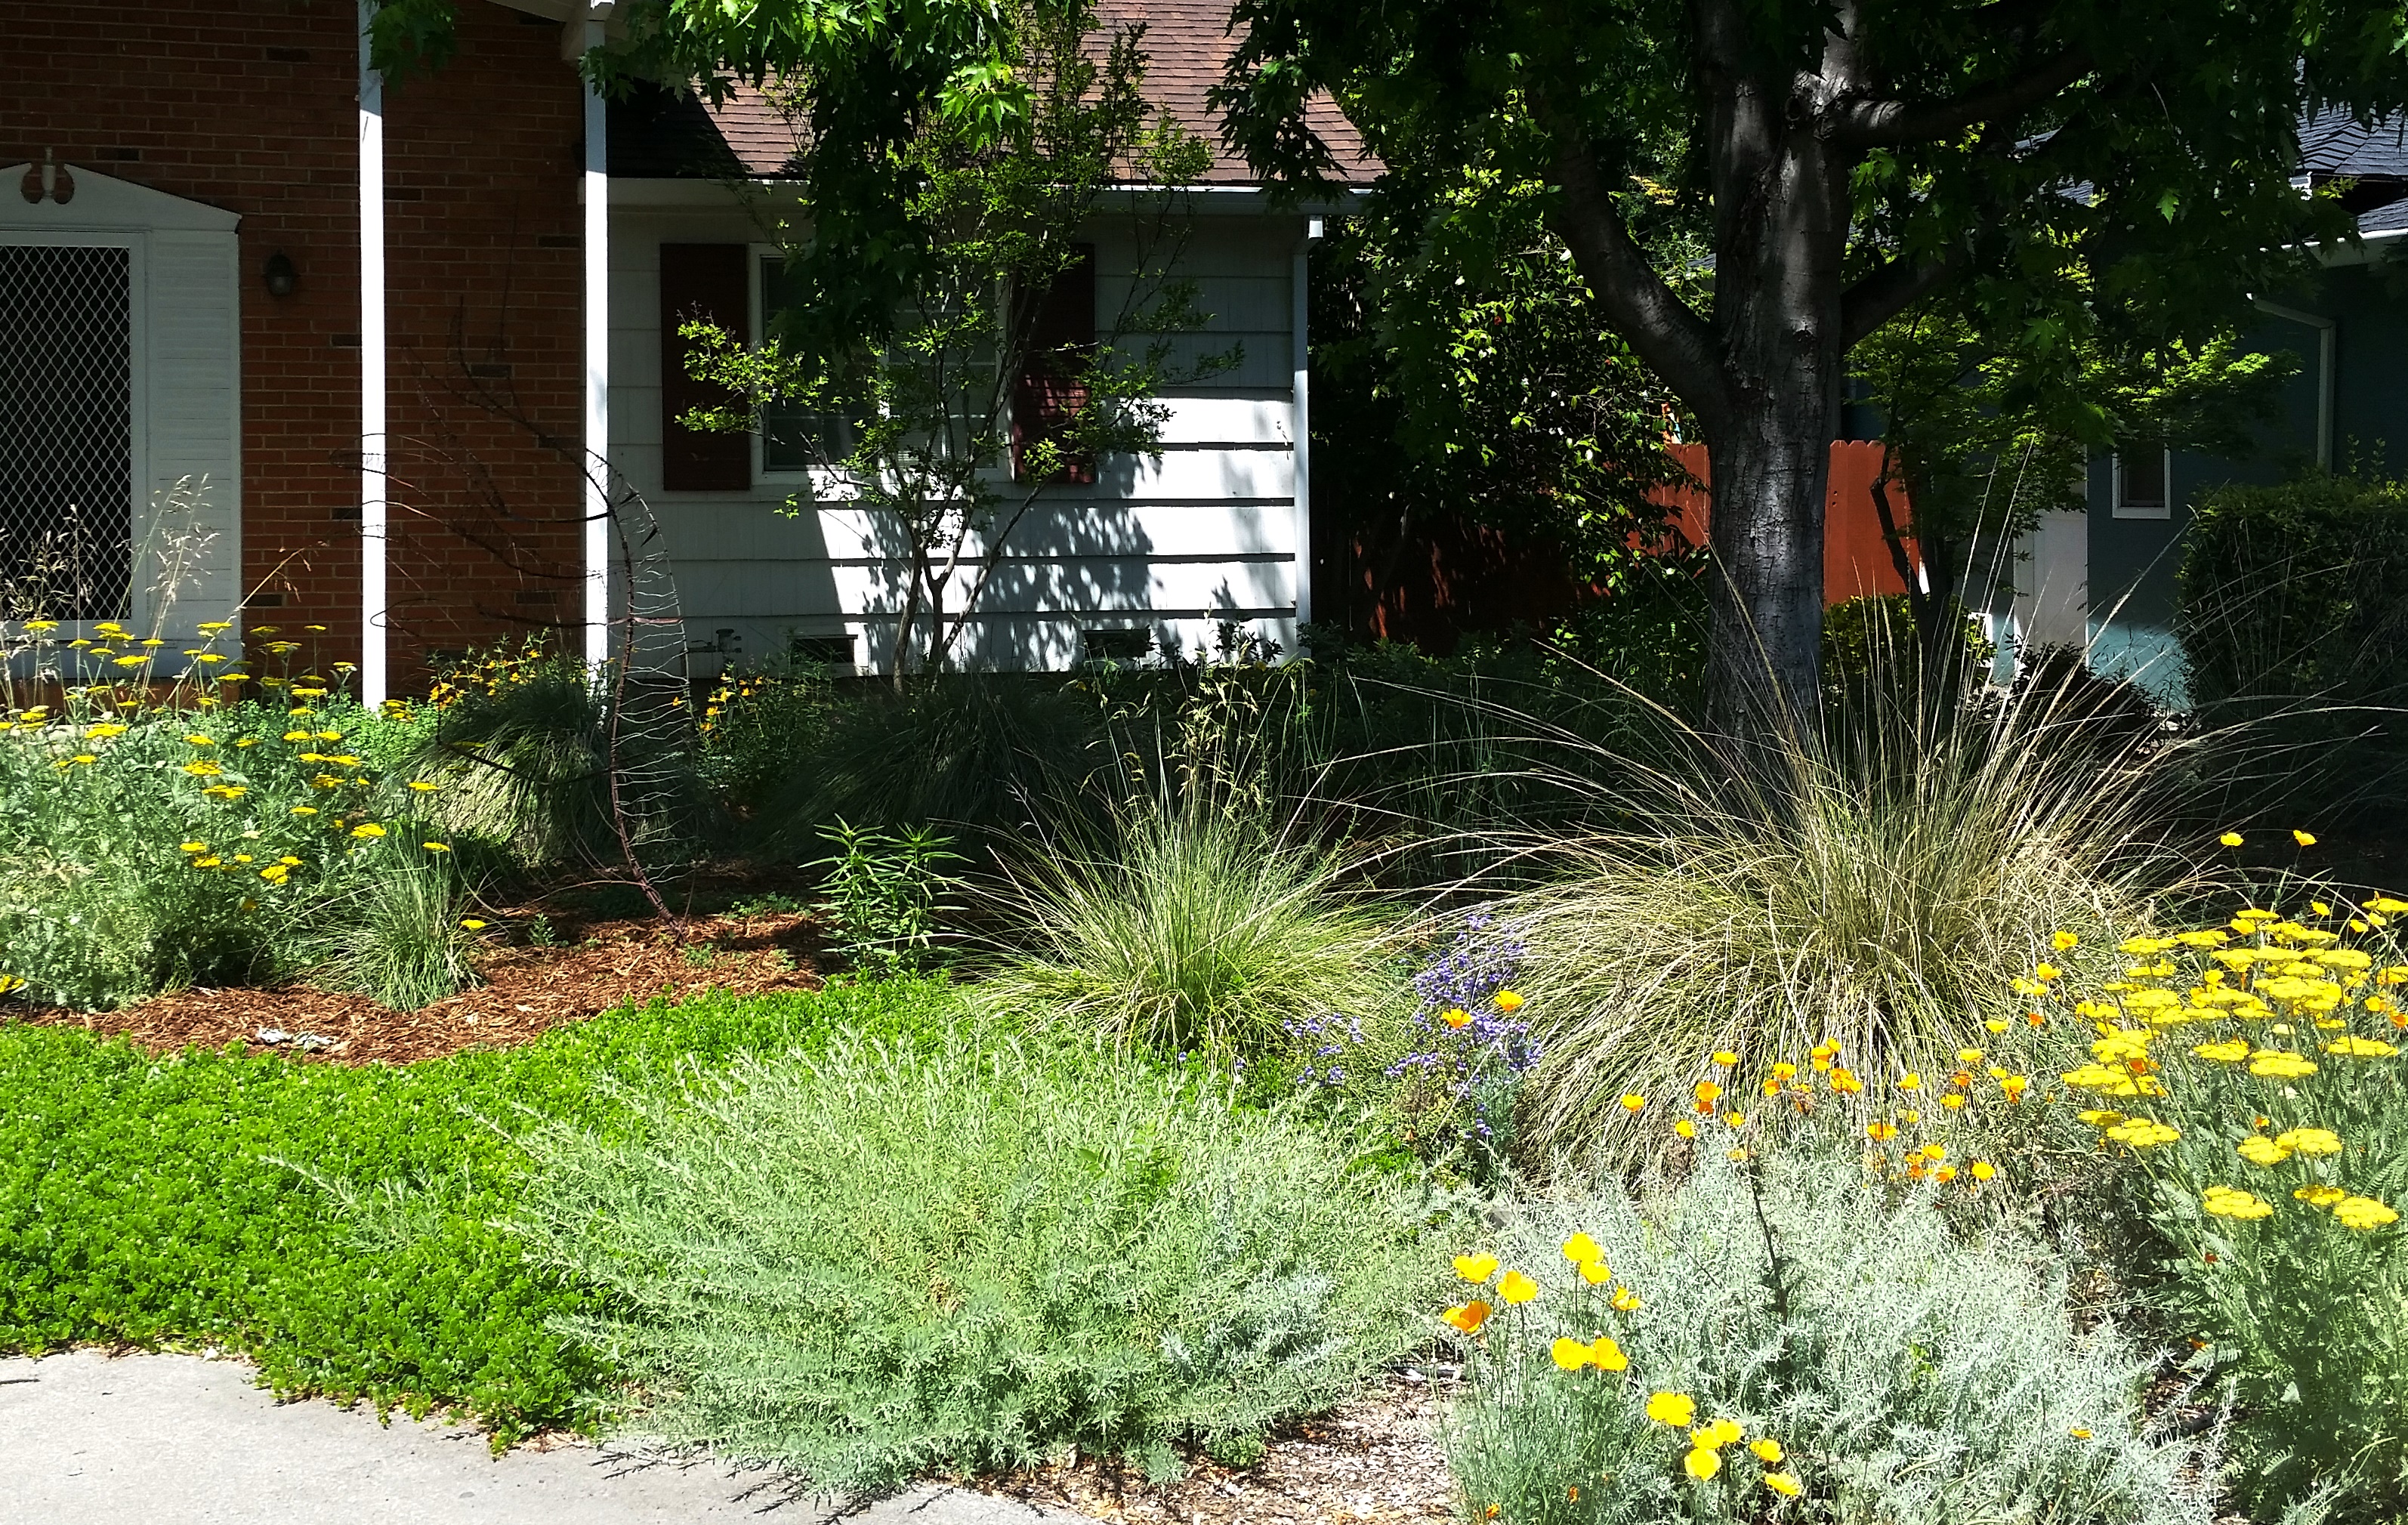
A Native Rich Garden Saves A lot of Water

Keeping lawns lush and healthy expends resources in addition to water.  Pesticides, fertilizers, and herbicides applied to lawns can pose health risks to humans and leach into waterways.  Gas-powered lawn mowers produce as much as 5% of the nation’s air pollution each year.  Native gardens, in contrast, provide beauty that is truly green.

The following three steps can guide you in successfully converting your lawn into a native garden.

First, observe.  What existing trees and plants, besides your lawn, do you want to keep or remove?  What are the sun and shade patterns?   What types of grass grow in your lawn?  Do you have an existing irrigation system that can be used for your new plantings?

Next, kill your lawn. Homeowners can use either of two eco-friendly methods to kill their lawns.  Solarizing is done in full sun during summer and takes 4-6 weeks.  It works best on fescue, ryegrass, and bluegrass, with limited success on Bermuda grass.  Sheet mulching can be started any time of the year.  It takes 6-12 months, works in sun or shade, and is effective on all grasses, including Bermuda grass.  See my earlier posts for step by step instructions for solarizing and sheet mulching.

Finally, replant.  Whichever method you choose, time implementation so that you are ready to replant in the fall through early spring when cool temperatures and moist allow native plants to develop the healthy roots they need to thrive with little water during the heat of summer.

Sticky Monkey Flower: great for pollinators and your water bill.

Sticky Monkey Flower: great for pollinators and your water bill.

Select a mix of trees, grasses, perennials, and shrubs for your native garden.  Trees such as Western Redbud and Desert Willow add shade, privacy, and colorful blossoms.  Dramatic bunch grasses like Deer Grass, California Fescue, and Blue Gramma grass enliven with texture and movement.  The flowering evergreen shrubs Ceanothus ‘Concha,’ Cleveland Sage, Coffeeberry, and California Buckwheat provide definition and screening.  Perennials such as yarrow, BOP Penstemon, Naked Buckwheat, and California Fuchsia bring pizazz and pollinators into the garden.  Sticky Monkey-flower and Hummingbird Sage brighten part-shade areas beneath existing trees. And, for those who miss the year-round green of their former lawn, there are evergreen groundcover manzanitas such as ‘Emerald Carpet’ and ‘Green Supreme.’

It’s a fine balance: a native garden can add so much to your garden while subtracting a chunk from your water bill.

The Front Yard Evolution Begins

A Resource Devouring Lawn

My mission to convert lawns in Chico into native and edible gardens began with a death.  My kind and gentle father agreed to let me murder his front lawn.  This wasn’t a limping, half-dead lawn, either.  He’d been carefully mowing, fertilizing, and watering it into a state of lush greeness for the past nine years.  In fact, that was the only time he ever spent in his front yard.  And, being the supportive guy that he is, he not only approved of the proposed killing but acted as my accomplice.

Solarizing with Clear Plastic

We started Solarizing in late July.  Solarizing is a simple, non-toxic method for killing lawns that UC Davis has researched extensively, ceamador.ucdavis.edu/files/942.pdf.  We thoroughly soaked his lawn with water (I mean, really soaked it, for hours) then rolled 4 mil clear plastic to completely cover it.  We used 1×4 boards and stones that my Dad already had to securely fasten the plastic.  Total time: less than 2 hours.

Six weeks later, we removed the plastic.  Ta da!  Nothing but dead lawn except for a couple of small spots in the shadow of the large maple that grows in the center of the lawn.  I used a hoe to peel these out, roots and all.  We left the remains of the former lawn where they lay so they can compost into humus.

We were ready to start Phase 2: planting.

Here’s a step by step description of our Solarizing process.

The Lawn is Dead

Materials:

1. Widest clear plastic sheeting you can find – least 10′ wide, clear plastic. Wider is better although more cumbersome to use. You can use one to four mil thickness plastic for solarizing. We used 4 mil thickness because we were concerned that wind might tear a thinner plastic.  However, thinner plastic does allow more heat to get to the soil.  Painting stores and hardware stores carry all types. It’s sold in rolls.

2. Fastening materials: Clear plastic packing tape (the strong, wide kind) to hold the plastic sheets together at the seams.

3. Fist sized stones or narrow boards to weigh the plastic down to prevent billowing.

4. Marking spray paint. This is the kind that sprays upside-down.

5. Utility knife to cut the plastic.

6. Two people (three is even better) on ‘plastic day’

Process:

Solarizing is a non-toxic method to kills lawns and annual weeds.  It works best in full sun.  Use solarizing to kill fescue, rye, and bluegrass lawns.  It is less successful for Bermuda grass.

Day One: Preparing your lawn

1. ‘Scalp’ your lawn with mower set at lowest setting.

2. Mark the location of your irrigation heads with the spray paint. Spray the grass around the head, not the head. If your irrigation heads are hard to find, turn them on briefly so you can spot them.

3. Using a trenching machine, cultivator, or a shovel, dig a trench 4″ deep by about a foot wide around the perimeter of the area to be solarized. Bevel the inside edge of the trench so that there is not an abrupt ‘drop’ into the trench.  Pile the dirt along the trench outside of the area that will be solarized. Watch out for your irrigation heads!

4. Water your lawn very thoroughly. This may take a whole day or more if you don’t have automatic sprinklers; you need to soak it deeply with about 12″ depth of water. Put several cans on your lawn to keep track of how much water you are putting down.

Day Two: Plastic Day

5. Put plastic down: Starting at one of the outside edges, roll plastic out one row at a time. Use dirt stockpiled from your trench to anchor the outside edge of plastic. At seams, overlap by 6-12″ and use a several inch long piece of tape every few feet to fasten the top layer to the bottom layer.   To prevent billowing in wind, place boards or stones on the plastic.   Success depends on a snug fit and tight seal!

6. Wait 4-6 weeks. It will take longer if the weather is not consistently hot (above 80 degrees) during the day or if there is shade cast onto the area.

7. Remove plastic. Dump trench soil onto the interior of the dead lawn so that you retain your trench. The trench will help prevent mulch (added later, after solarizing is complete and plants are in) from spilling from your planting beds. If any patches of lawn show signs of life, use a hoe to peel back and remove the sod.  As for the dead lawn; just leave it in place.  Eventually it will compost.