Category Archives: New Projects

My Own (Demo) Garden

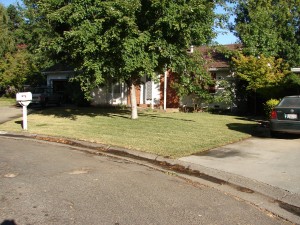
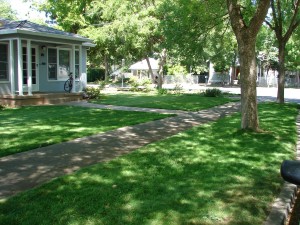
Look at all of that doomed lawn!

Summer is cooking along and I’ve been mulling over my own garden.  I moved into my new home last winter.  Its a darling vintage bungalow on a corner lot in the Avenues. Pistache and Hackberry trees planted in the parkway strips grace the front yard with dappled shade.  The back yard gets the most sun (great for the veggies) and has a shaded patio to keep me cool.  The dirt is deep and fertile.  And, the house came with a LOT of beautiful, green lawn.  Such potential!  I’m starting with the front yard: it has everything I need to create my own artsy-funky, highly visible native/edible demonstration garden.

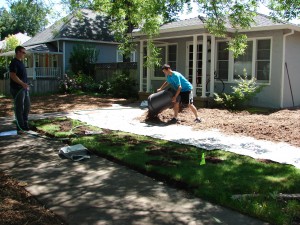
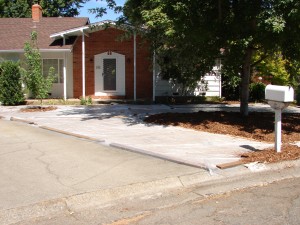
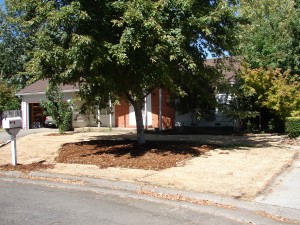
First step: scare the neighbors.  Nothing catches the attention of passersby quite so quickly as burying a thriving front lawn under six inches of wood chips.  I had to stifle a chuckle when Pam, who walks her two pups by my house daily, summed up our post-burial conversation with a sigh of relief.

“Ohhhhhh . . . so you are going to put some plants in again.”

Yes, I am.  The brown look is just a means toward the goal.  The wood chips, and the sturdy layer of newspapers beneath them, are a low-tech way to kill lawn known as sheet mulching.  Sheet mulching works in gardens that receive partial to full shade.  In the fall, when the grass is composted, I’ll start rebuilding my yard.  I’ll add fun stuff like a low fence to

Sheet mulching: 5-8 sheet thick layer of newspapers topped with 6″ of wood chips.

define my space, an arbor over the front walk, a small patio of recycled concrete in the shadiest corner, and lots and lots of plants.  The parkway strip will be all natives.  The sunny side yard will have edibles like grapes and fruit trees.  In the front yard, natives will reign again except for the sliver right up against the north side of the house where shade loving shrubs, survivors from my home’s previous life, will remain where they’ve been growing happily for years.  Sometime next year, the neighbors will be smiling again.

So, How Much Did It Cost?

With Eve’s Garden Design, one of my goal’s is to bring beautiful, sustainable gardens to regular people.   A garden really can be installed by hand without calling in the big machines; it can be maintained by people without a degree in horticulture, and it can require minimal care so that it is a joy, not a burden to its humans.  And, a garden can be affordable.

My dad’s garden is a bit of a demonstration garden.   I used ‘best practices’ in constructing it to minimize future maintenance requirements and so that I would be able to tell people how much it costs to do it right.  We kept every receipt for the materials used.

This garden cost less than $1,000 for all materials. By next summer, it will be beautifully filled in.

The total cost?  $943, including sales tax.

That includes plastic sheeting for solarizing, parts to convert his spray irrigation system to drip, landscape fabric (weed barrier), plants (and I did over-plant in my enthusiasm for creating a lush looking demo garden), mulch, and sand for under the pavers (the pavers were free, salvaged from the demolition of another project).  It doesn’t include hiring laborers because we did all the work ourselves.  That’s my 78 year old dad (two prosthetic knees), my very strong brother for one day, and me.  It took approximately 40 people hours to install everything, working at a reasonable, not frenetic, pace.

And, there are many ways to cut the cost far below what we paid for my dad’s garden.  A sustainable garden is an investment in your future and in the future of your neighborhood and your planet.  It will enrich your life and doesn’t have to hurt your bank account.

Simple Changes

When I analyze gardens that are about to be remodeled, I’m looking for ways to make them better fit my client’s needs.  In the case of my Dad’s front yard, he was tired of all the lawn upkeep.  Other than that, he was happy with what he had.  It was a simple layout with an existing walkway that connected the front porch to the driveway, two existing maple trees, and lawn. 

One of my jobs, as a designer, is to suggest possibilities that my client’s may not have considered.  For this garden, I noticed that the existing walkway didn’t really take people where they wanted to go.  It forced users to make a hard right immediately after stepping off the porch and deposited them right next to the garage door.  Adding a path that traveled straight out from the porch before curving toward the driveway would offer a sensible, gentler route. 

A New Path

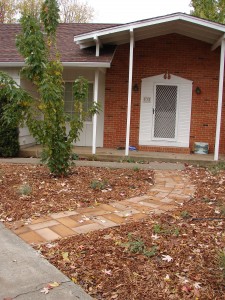
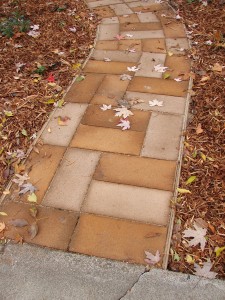
We recycled some used 8″ x 16″ concrete bricks that I had leftover from demolition of another project to make the new walk.  I’m a huge fan of repurposing landscape materials to save costs and resources and look for creative ways to use what is already on hand.  In this case, coloring the bricks and using an alternating pattern when laying out the path created a fresh look that compliments the home and garden. 

 To enliven the gray bricks, I stained some of them with Scofield Chemstain. Chemstain reacts with the concrete silicates to create mottled, permanent color.  I used Pale Terracotta color to give them a rich rusty brown color that looks good with the bricks on the front of the house. 

The path layout is simple; it aligns with the front door and sweeps toward the driveway.  We left the original path in place so people can get straight to the garage but find ourselves most often using the new path to leave the house. 

Brick Color and Pattern

An Artsy Touch

Once all the plants were in, the garden still needed something.  First thought: a grouping of native lichen-covered boulders.  Second thought:  how the heck would my 78-year-old Dad and I pull off a boulder placing project (I am quite the pencil-neck).   Then: DOH!  How about some art?  I’ve been telling people I’m an artist; here was a chance to make good on that claim.

What the garden needed was something vertical and fairly big to add visual weight and to provide a link between the large existing maple tree and the low growing grasses and perennials that we just planted.  A sculpture, weather proof, subtle to respect my Dad’s complete lack of ostentation.  And something that would be specific to this particular garden.

A Sculpture to Reflect My Father's Personality

To generate ideas, I spent a bit of time brainstorming and writing with my left (non-dominant) hand.  In her inspiring book, Visioning, Lucia Capacchione discusses how this technique can greatly improve access your right brain and subconscious.   I’ve been using it for several years for everything from garden design to portrait paintings and am always amazed at the unexpectedly creative results.

For this project, I wanted to develop a concept that would reflect my father’s love of sailboarding.  Yes, my Dad – who hosts two prosthetic knees – is a big-time windsurfer.  My right brain took the idea of a sail-inspired wire sculpture and ran with it.

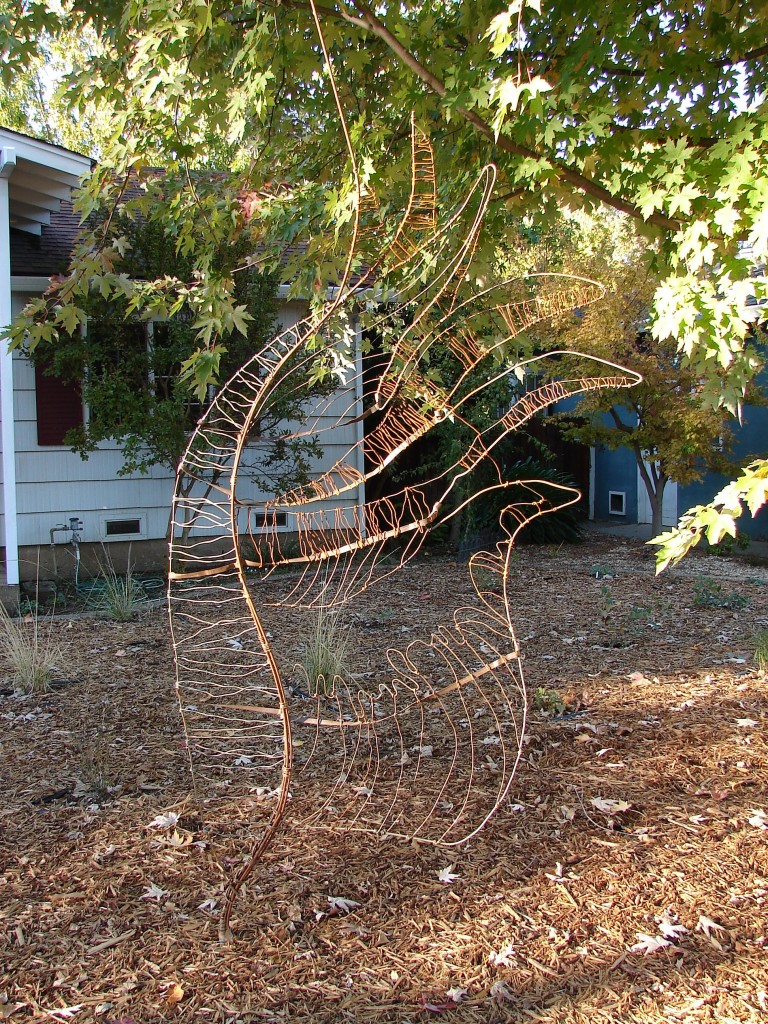
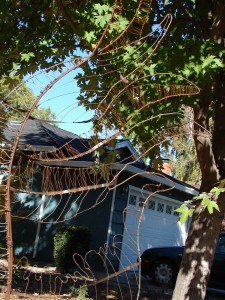
Sail On, a wire sculpture reflecting my father's passion for windsurfing and aviation

The final sculpture has the basic form of a sail, sort of, with a mast and metal strips that suggests the ribs of the sail.  My right brain thought I should play with the shape to suggest a wing with ‘feathers’ of bent wire to reflect my Dad’s career as a pilot as well as to refer to a seafaring bird, the Royal Tern, that visits my dad’s favorite windsurfing mecca, Bonnaire.  And, add abstracted wave patterns to reinforce the windsurf element.  The whole thing is made out of twisted metal, much of it salvaged, with no welds. The wire and rebar had to be thin enough for me to hand bend so the piece has a very light, open appearance that, with its gentle rust color, does not overpower the garden in spite of its 7′ height.

Next Up: Irrigation

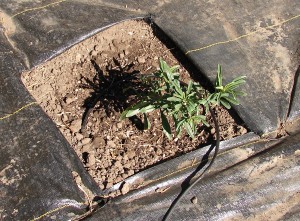
Drip emitters for this plant are punched directly into the 3/4" main tubing

Once the plants were in the ground, we still had some work to do.  My goal is to provide a lush garden that requires very little maintenance.  And, with as many plants as we added, that means adding automatic irrigation and mulch.

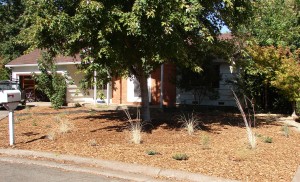
My Dad already had three spray irrigation zones in the front yard that he had used to water his former lawn.  We kept one spray zone to water some of the existing plants that we left in place.  The other zones we converted into two drip irrigation zones, one for the shade tolerant plants that went in the shadow of an existing maple tree and one for the sun-loving super drought tolerant plants.

The in-line emitter method with 1/4" tubing with 1/2 gph emitters every 6".

We ran 3/4″ Hardy Blue line piping in a closed loop from each valve then added drip emitters at each plant.  We used two different methods to put the emitters at each plant. Method A:  Punch the 1 gallon per hour (GPH) drip emitter directly into the 1/2″ drip main tubing.  We did this wherever the main was located right up next to a plant.  Method B:  Where plants were located away from the main tubing, we ran 1/4″ spaghetti tubing from the main to the plant, then connected 2′ of  in-line emitter tubing that has 1/2 gph emitters at 6″ o.c. spacing  (4 emitters per plant).  The loose end of the tube gets a ‘goof plug.’  Both methods work well; you can pick either one or combine them in a single zone.

Once all of the plants had irrigation to them, we tested the system to make sure everything actually worked as planned.  It did!  A 4″ layer of mulch over the landscape fabric and irrigation tubing finished up the job.

We ran both of the drip zones for a half hour that day.  Then, we ran both zones every three to four days for the next couple of weeks.  Because we did a major no-no, planting in the summer, we had to watch the plants closely and add more water than we would have if we’d have planted a month or two later.

When temperatures shot up to the high nineties and then topped 100 for a couple of days, some of the new plants were stressed.  I pruned back those that looked crispy and they are all now showing healthy new growth.  These guys are tough.

Now, a month after planting, we are

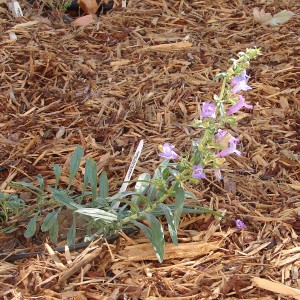
Foothill Penstemon two weeks after planting, in full bloom and growing.

running the shade zone every 4 to 5 days and the sun zone once a week, both for 1/2 hour.  Total water usage for the two zones is less than 100 gallons per week.  Compare that to the 625 gallons per week that my Dad had to put on the former lawn.  And, next summer, when the plants are fully established with nice big root systems, we’ll be watering the sun zone only once or twice a month and the shade zones about once a week.  Amazing!

The Front Yard Evolution Begins

A Resource Devouring Lawn

My mission to convert lawns in Chico into native and edible gardens began with a death.  My kind and gentle father agreed to let me murder his front lawn.  This wasn’t a limping, half-dead lawn, either.  He’d been carefully mowing, fertilizing, and watering it into a state of lush greeness for the past nine years.  In fact, that was the only time he ever spent in his front yard.  And, being the supportive guy that he is, he not only approved of the proposed killing but acted as my accomplice.
Solarizing with Clear Plastic

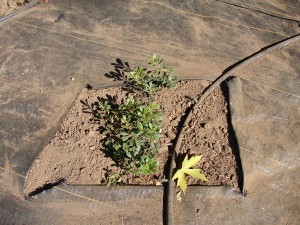
We started Solarizing in late July.  Solarizing is a simple, non-toxic method for killing lawns that UC Davis has researched extensively, ceamador.ucdavis.edu/files/942.pdf.  We thoroughly soaked his lawn with water (I mean, really soaked it, for hours) then rolled 4 mil clear plastic to completely cover it.  We used 1×4 boards and stones that my Dad already had to securely fasten the plastic.  Total time: less than 2 hours.

Six weeks later, we removed the plastic.  Ta da!  Nothing but dead lawn except for a couple of small spots in the shadow of the large maple that grows in the center of the lawn.  I used a hoe to peel these out, roots and all.  We left the remains of the former lawn where they lay so they can compost into humus.

We were ready to start Phase 2: planting.

Here’s a step by step description of our Solarizing process.
The Lawn is Dead

Materials:

1. Widest clear plastic sheeting you can find – least 10′ wide, clear plastic. Wider is better although more cumbersome to use. You can use one to four mil thickness plastic for solarizing. We used 4 mil thickness because we were concerned that wind might tear a thinner plastic.  However, thinner plastic does allow more heat to get to the soil.  Painting stores and hardware stores carry all types. It’s sold in rolls.

2. Fastening materials: Clear plastic packing tape (the strong, wide kind) to hold the plastic sheets together at the seams.

3. Fist sized stones or narrow boards to weigh the plastic down to prevent billowing.

4. Marking spray paint. This is the kind that sprays upside-down.

5. Utility knife to cut the plastic.

6. Two people (three is even better) on ‘plastic day’

Process:

Solarizing is a non-toxic method to kills lawns and annual weeds.  It works best in full sun.  Use solarizing to kill fescue, rye, and bluegrass lawns.  It is less successful for Bermuda grass.

Day One: Preparing your lawn

1. ‘Scalp’ your lawn with mower set at lowest setting.

2. Mark the location of your irrigation heads with the spray paint. Spray the grass around the head, not the head. If your irrigation heads are hard to find, turn them on briefly so you can spot them.

3. Using a trenching machine, cultivator, or a shovel, dig a trench 4″ deep by about a foot wide around the perimeter of the area to be solarized. Bevel the inside edge of the trench so that there is not an abrupt ‘drop’ into the trench.  Pile the dirt along the trench outside of the area that will be solarized. Watch out for your irrigation heads!

4. Water your lawn very thoroughly. This may take a whole day or more if you don’t have automatic sprinklers; you need to soak it deeply with about 12″ depth of water. Put several cans on your lawn to keep track of how much water you are putting down.

Day Two: Plastic Day

5. Put plastic down: Starting at one of the outside edges, roll plastic out one row at a time. Use dirt stockpiled from your trench to anchor the outside edge of plastic. At seams, overlap by 6-12″ and use a several inch long piece of tape every few feet to fasten the top layer to the bottom layer.   To prevent billowing in wind, place boards or stones on the plastic.   Success depends on a snug fit and tight seal!

6. Wait 4-6 weeks. It will take longer if the weather is not consistently hot (above 80 degrees) during the day or if there is shade cast onto the area.

7. Remove plastic. Dump trench soil onto the interior of the dead lawn so that you retain your trench. The trench will help prevent mulch (added later, after solarizing is complete and plants are in) from spilling from your planting beds. If any patches of lawn show signs of life, use a hoe to peel back and remove the sod.  As for the dead lawn; just leave it in place.  Eventually it will compost.


Welcome to My Garden

Although Eve’s Garden Design is a new venture for me, it’s been a nearly 20-year journey getting here.  Over the years, I’ve designed a lot of interesting places, from intimate gardens to parks, streetscapes, and plazas.  Each project has helped define my sense of  purpose as a landscape architect and has honed my design sensibilities.  And now, I find myself knowing precisly what I want to be doing.  I want to work with people who are ready to move from the usual toward the unexpected, who want their outdoor spaces to reflect their ecological ideals and their personalities, and who want to surround themselves with artistic, sustainable, life-giving beauty.  The crazy economy is already giving us a nudge (a shove?) in a less-consumptive direction.  I’m going to run with that.